Friday, December 21, 2018

Aurora Raglan -- Sofiona Designs


 What a fun pattern this is.  The simplicity of a Raglan, with a bit of a zing.  There are several options; shirt, or tunic, pockets, ties, and two collar options, banded or faced.


This is the shirt length, with ties, and faced neckline.  We love it.  This shirt will be free for a very limited time!!! To get the coupon code you need to join their Facebook group Sofiona Designs Fan Group.  BUT that's not all they're also releasing the Pinecone skirt!!!! That will be a free pattern as well.  It's so exciting. 


Here's a great shot of the Aurora and Pinecone together, aren't' they a lovely set. 
Brought to you by the creative talents of  Windsor Woolies


It's a very versatile pattern.  Leave off the ties and pockets for a lightening fast sew!!  Or add them on to make it extra special.

This outfit has paird the Aurora Raglan with the Railway Joggers, also by Sofiona Designs.


                                                                  So comfy and cute.


Wednesday, December 19, 2018

Cute Tote Bag -- Free tutorial.


I was searching all over for a new fun little tote to make as a teacher gift this year.  I found this one, over at  DIY Tutorial Ideas!, and decided it was perfect. 


The original measurements are all in metric, which I converted to Imperial ( I rounded them to make it easier).  I also changed a few things.  I made the lining a solid piece to simplify it, and I changed up the straps a bit.


I'm not going to be giving you a complete step by step tutorial, I'm assuming you have some basic tote/bag making experience. If you need more make sure to read through her tutorial before you start, or check back for to hers for the in between steps. 


Sooooo lets get started


Sometimes the hardest part of any project is deciding which fabric to use. 
 I has this stashed away from the Creativ Festival. 

  
Here we go everything is cut and ready.  The dimensions are as follows.  (her original numbers in cm for anyone that wants them, for complete instructions in cm check out her blog post)

Outer bag-- Top- 4" x 4"                   (10 cm x 35 cm)
                  Accent piece 2" x 14"   (5 cm x 35 cm)
                    Bottom 8" x 14"            (20 cm x 35 cm)
Strap -- 5" x  42"  (10cm x 100cm-orignal measurements I widened and lengthened mine a bit)
Lining -- 13" x 14"  
      pocket   -- 5" x 5"          
Batting/interfacing/soft and stable or foam 13" x 14"

 For the strap I wanted it wider, and padded a bit, so I cut a piece of scrap batting, and just put it down the middle before I sewed it.  I held it in place with one of my favourite sewing tools, my glue stick. 

If you've watched my video 'sewing curves' you'll learn I'm not a big fan of pins when I don't really need them.  To keep the strap feeding evenly, hold the fabric like this, it keeps the bottom from getting fed through faster, and cuts down on your need to pin something straight like this.  

 She has you sew each side, but I like to add on down the middle because of the batting  It holds it in place, and I think it looks nice, giving it a quilted look.


 Then you'll want to sew the accent piece to the bottom piece, making sure it's on the top.  Sew them right sides together and then add your straps. 

 Now since my straps are a bit longer then called for I took the extra length, which was about 3/4" on each side and let that hang off.  I wanted to be able to secure the straps better, so it would make the bag more secure.  Then sew on your top piece on both sides.  Press both seams with straps going up, and the tails of the straps pointing down so you can topstich them in place, but wait until you put the backing on first. 

Now I don't use Soft and Stable I use this shelf liner.  You can buy it the dollar store, Canadian tire or hardware stores.  It's not the bumpy stuff for your kitchen shelves, the nonskid roll, it's thicker and solid, and it's for lining drawers in a tool chest.  Sometimes it's in the tool aisle or kitchen with the others.  I find it works just fine, and the price is soooooo much easier on your wallet.  I use a generous amount of glue stick, and lay it on carefully and press out any wrinkles.  It's a bit tricky to sew, use a Teflon foot if you have one, and lower the pressure on your presser foot.  If you don't have a teflon foot, just use a piece of paper, or tissue paper between the foam and your presser foot.  Then just carefully rip it off after, it's really easy.

You could also use regular interfacing, fusible fleece or any kind of batting you'd like. I wanted the bag to stand up on it's own. 
 

 Next I went and top-stiched my seams down through the interfacing as well.


I also did a box below to tack my straps in, and reinforce the a bit.  


Then you want to cut your corners.  I did mine larger then I should have I went with 2.5" x  2.5" because I read her numbers wrong, whooops so it's a bit boxier then it should have been. Next time I'll try 1.5" or 2" square, let me know what you decide.  Then you want to line your seams up and sew across it.  All seam allowance in her pattern are 1/4".  


Added a quick pocket inside, and then sewed the outer bag right sides together, and the lining right sides together as well.  Then turned the outside bag inside out and put the lining inside, right sides together, sewed the top, and turned the whole thing out through an opening in the bottom of the bag.   the foam will make it thick so be sure to trim some back before top stitching.  

I added another small pencil pocket on the other side.  I cut 2 pieces 4' x 2.5', made them into a pocket and stitched down the middle for two pens to fit.  (see picture at bottom of post) 

Sewing tip: I like to increase the seam allowance on my lining so that it ends up being a bit smaller, and less likely to get baggy inside.   

 I did you use pins to hold it all shut nice and tight, and sewed my lining closed

 awww she's so cute!!!!  


 I'm really happy with how this turned out.  I have a feeling this will be my new go to tote.  It would be really easy to change the size as well.  Just decide what you want it to be, and figure out your lining after you're done with the outside. 


I'm on YouTube!!! Check out my new YouTube Channel!


That's Sew Venice--YouTube Channel


You heard that right!!!! The ladies over at "Mamma Can Do It" Invited some of us to do a video, for their 12 days of Christmas.  If you missed that post and those videos, just look down my blog here 12 Days of Giveaways.   The two videos that I did were "Gathering with Elastic"  and "Sewing Curves".   

Have you ever fallen in love with a really fluffy, ruffly dress, buy the pattern and then get to scared/intimidated to actually make it?  Sound familiar????   Well now you don't have to worry , because my latest tip, really makes it so much easier. 

The Gathering video is a technique I came up with a few years ago, after struggling with like 90 feet of ruffles hahahaha.  It was pretty frustrating.  I now use this for any gathering I need to do whether it's 12" or 12'.  I hope you enjoy it.  If you have any questions please feel free to comment on the video.


The Pattern used in this video is the Patricia - Simple Life Pattern Company.


Sewing Curves
:
with only a couple of pins.  This is something I learned in Beverly's Craftsy Class --- Sewing Bras: Construction & Fit.  It was scary at first but it revolutionized the way I sew.  I use this with most seams, curves or straight.  It has really sped things up.  It's not only great for clothes but for bags as well.  Getting that gusset sewing in nice and even, and not having to worry about having enough clips, or getting stabbed by pins.  Give it a whirl and let me know what you think.  Maybe use a basting stitch your first few times ;)


The  pattern used in this video is the Simco Nightgown Add-On - Pollywoggles Patterns


I hope to keep adding videos.  I have a few ideas in the making.  I want to talk more about fit, and FBA's.  And I also want to do a video on PDF'S and why I love them.  If you have any ideas for videos or any questions please comment below.   Stay tuned!!!!


And before I forget please go and subscribe to my brand new YouTube Channel- That's Sew Venice--YouTube.   Click like on the videos if you enjoyed them.

For more information on the Patricia pattern, check out my review.  SLPCO-Patricia knit add on.


Wednesday, December 12, 2018

Day 12--Gathering with Elastic Thread - Mamma Can Do It.


Today's the last day!!!! I hope you had a great time.  I know I really enjoyed all the videos and saw several new tricks and tips I can't wait to try out. 

My second video is up today, Gathering with Elastic Thread.  This is a technique I discovered a few years ago while making a bubble skirt.  It has saved me so much time, and headaches over the years.  I'm happy to share this with you. 

Anytime you need to make gathers, especially when they have to fit in a loop, give this method a try.  For this I just use cheap elastic thread from the dollar store.   If you have any questions just comment here on Youtube an I'd be happy to help. 

Did you keep track??? Miss  any??? Head on over to their Youtube Channel and catch up. Here's a link to my Gathering with Elastic Thread-Youtube

I big thanks and Shout out to Mamma Can Do It Promotion Team.  A lot of time, effort and nerves went into bringing these videos to you.  Please check them out and give the videos a thumbs up and subsribe.  Come back here and let me know what your FAVORITE tip was, It's ok if it's not mine ;) ahahha.

Make sure to go to their FB group to check out the rest of the prizes. 


mammacandoit.com?aff=226


They have a ton of other tips on their blog, as well some some amazing patterns on their website, go check them out Mamma Can Do It.

Saturday, December 8, 2018

"Sewing Curves" My Video is up on the -- 12 days of Christmas-Mamma Can Do It


 So how have you been enjoying the videos so far????  Make sure you go check them all out, and make sure you don't miss any.  There are some really good tips posted.

My video is up today, and as you know I'm not a big fan of having to pin, so this is my easy-peasy way to sew curves.   That's Sew Venice--Sewing Curves it might look scary, but practice on some   scrape pieces.  It is very liberating to be able to go 'pinless' ahahhaha so to speak.  And it really speeds things up.  You can use this on pretty much any seam.  I do use a Pin/clip when I have two seams meeting, because while I do like 'smart and lazy', I also am pretty precise when it comes to those details.  So don't worry about sacrificing quality. 

Just because you were taught to put in a million pins, and 'that's the way it's always been done' doesn't mean we can't try and learn new techniques, to speed up our sewing and increase enjoyment. 

I big thanks and Shout out to Mamma Can Do It Promotion Team.  A lot of time, effort and nerves went into bringing these videos to you.  Please check them out and give the videos a thumbs up and subsribe.  Come back here and let me know what your FAVORITE tip was, It's ok if it's not mine ;) ahahha.

Make sure to go to their FB group to check out the rest of the prizes. 


mammacandoit.com?aff=226


They have a ton of other tips on their blog, as well some some amazing patterns on their website, go check them out Mamma Can Do It.

Tuesday, December 4, 2018

Round Fabric Basket--AppleGreen Cottage-- Pattern review.


Well, AppleGreen Cottage is at it again.  


You might remember her from these handy little KAIA MINI Fabric Bins.   These were another fun, quick project.  I love quick sew's that look unique, and help me use up my stash.  The scalloped edge is a nice touch and looks great up, or folded down.  These can be used for lots of quick gifts. 


This year she has released this adorable Round Fabric Basket.  
 I was given the pattern and asked to give an honest review, so here goes. 


EEEK how cute are these, my daughter is going to flip.  First off this pattern comes in 3 different sizes, all of the dimension are on the pattern.  I went with the medium.  I know I will be making more.  These are perfect for gifts.  Stuff with all kinds of fun things.  You could fill with stationary kits, mini diaper bags for emergencies, put in a diaper onsie, wipes.  Or sleepover bags, lotion, lip balm, sleep mask . . . The options are endless.  Ok now that you know you want to make a few lets see how it went for me. 

When you first look at the pattern it might seem a bit overwhelming.  There are a ton of charts and numbers, but that is because she is very thorough.  She has provided pattern pieces for everything to print out, but has also given a cutting chart in case you don't want to print it and tape it together, so everyone is happy.   So if you're going to print the pattern out, just skip past the cutting charts, and get started.  That is a great feature for someone that doesn't have access to a printer, or is out of ink or paper . .  . not that I would no anything about that 😉. 

 Now as you'll see I did make a few minor changes to my version.  And this is not because I thought it was better, by any means, I've just been trying to make things out of my stash.


The 3 changes I made are as follows:

1 & 2: Ribbon:  I used a piece of ribbon instead of making my own casing, which she has you do in the instructions.  I also used the same ribbon folded in half for the tab.

3. Grommet: I didn't have the size recommended in the pattern on hand, so I used ones I'd bought.  Which turned out to be a bit too big....sigh.  oh well they still look cute, and I'll keep my eye on the smaller ones going on sale.  


Now the set I had was an eyelet set, and didn't cut through the grosgrain ribbon, so I just folded it and snipped a wee bit off the edge.  Which gave me these diamond shapes. 


I rounded them out with the tool a bit and they slipped on no problem.  GREAT!!! Ok now we need to wack them in place.  And wow they're not kidding about how hard you really have to hammer them.  I tried upstairs in the sewing room, but it was a no go.  


Thankfully the garage floor worked perfectly.  A few firm taps with the hammer and Viola!!! we're done.  (I was really nervous about this aspect of the project to tell you the truth, but once you do it once, you'll realize how simple it is.  You can always look on YouTube as well)


Yay, they're in!!!  I liked her tip about sewing the casing down with the cord already inside, BUT since my ribbon was a bit narrower I was worried it would be harder to lay flat.  But no worries I used my trusty threading tool and just slipped it right through, worked like a charm. 


It worked.  Now if the thought of grommets has you scared, or you really want to be able to make this like RIGHT NOW.  There are a few other options, like a button hole, or even just cut your casing in half and hem the ends, and then leave a 1-2 gap in the middle.  I think that would work just fine.  But I do encourage you to give these a try, they look really nice. 


Now I don't want to give too much away, but the pattern has great pictures, and step by step instructions.  Just follow along and you'll do fine.

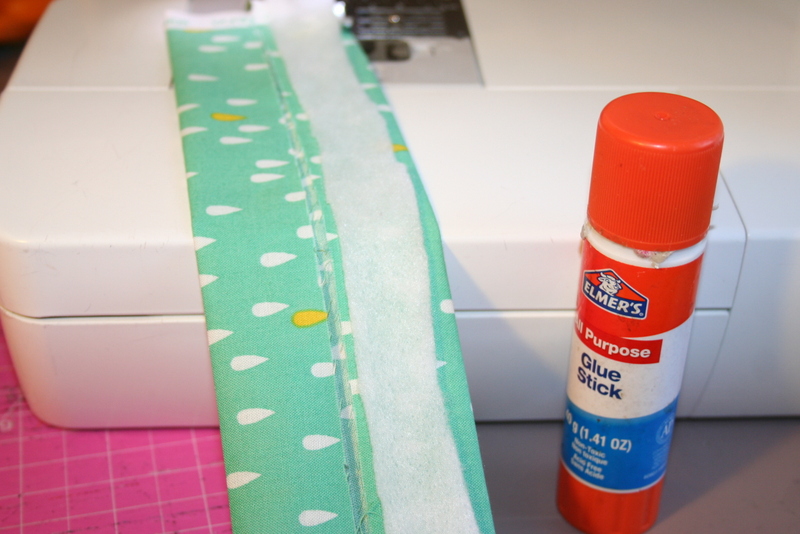
Another quick tip is to stack your bottom main fabric and batting together and just cut once, I don't know how many times I think to do this AFTER I'm done cutting everything. 


 I tacked my tab in before sewing just to keep in place. 


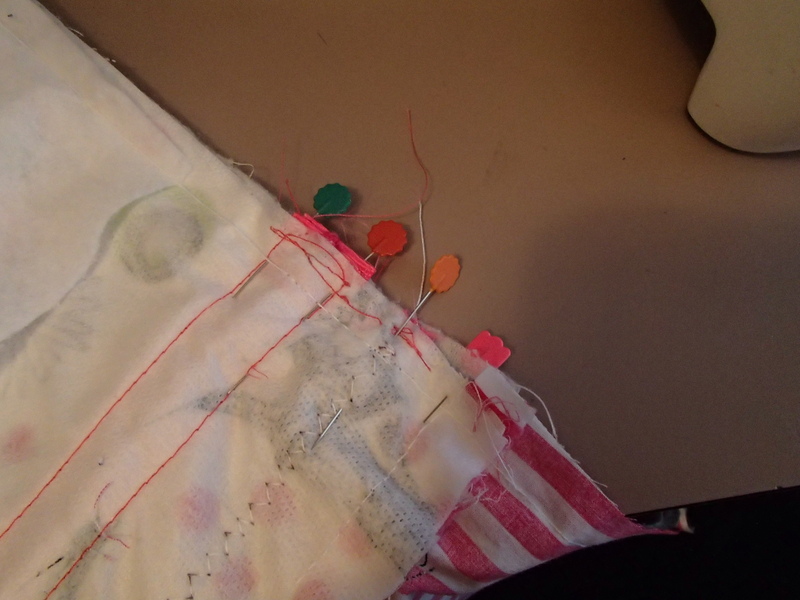
PINS!!! yes I used a lot of pins at this point, we're sewing the sides down, and you really want to make sure your casing, trim and top edge are perfectly lined up, and aren't going to move on you.  I know I don't usually use very many pins, but sometimes you really need to. 


The rest of the pattern goes together great, she really has done her math the bottoms lined up perfectly on both inside and out.  Just follow her simple steps and you'll be done in no time.  I like to use my applique, or duck-billed scissors for trimming, and trim right into my scrap bin, beats getting little bits all over my pants. 


Now it's time to turn your bag out, and and after a quick top stitch, and stitching your lining shut you're done.  It's really a quick project, and once you've made one, you'll want to make several more. 


Click here for the Pattern: Round Fabric Basket.  

Pattern 5 out of  5.   Highlights: 3 sizes, easily customized, easy to follow instructions, and the step my step photos are very clear.  She also caters to everyone, be it those that like a cut chart, or prefer to have the actual pattern pieces, there's something for everyone. 

Check out her website AppleGreen Cottage, for more adorable patterns, tutorials and some fun freebies.  She's also on Facebook AppleGreen Cottage--Facebook, like her page and never miss an update.

Please comment below with more ideas of items you could put inside!!!  This is really a great pattern for a quick, but beautiful gift.  It's also a wonderful stash buster!!!!!!  Check out my FB page for more gift ideas as well.  That's Sew Venice

Saturday, December 1, 2018

12 Days of Giveaways -- Mamma Can Do It


New to sewing???? Looking for some new tips???  Sewing has slowly changed over the years with new tools, tips and techniques, so check out these amazing videos, and comment down below with something you found "new" to you.

Each day from Dec 1st-12th there will be a few video tutorials available on the Mamma Can Do it Youtube page. Mamma Can Do It -- Youtube Channel   Make sure to click subscribe, and click the bell for notifications.

Day one--  We have 2 videos. Types of Needles to use with Knits.  & Applique for beginners.
Here is a direct link to the playlist so you don't miss any of the videos Mamma Can Do It--12 Days playlist

I will be doing a video about my favorite way to add a ruffle to the bottom of a skirt.    There are a ton of different ways, and I've tried most them of them, but I think mine has a unique take on it, so be sure to check out the video on Dec 12th, wrapping it up with  "Gathering Made Easy"--That's Sew Venice.


https://mammacandoit.com/?aff=226 


Dont' forget to join  Mamma Can Do It-Facebook Group to get in on all the Give aways.

Day 1:  GIVEAWAY: Elephant House Fabrics is sponsoring today's giveaway! They are giving away one free yard of their gorgeous custom fabric with shipping in the U.S. included, international pays difference. Shop EHF's website here: https://elephanthousefabrics.com/ The winner will also receive a $15 gift certificate to Mamma Can Do It's website.  You need to go Comment on the post in the group page to enter.   

Hope you have a wonderful Holiday Season!!! Merry Sewing 🎄